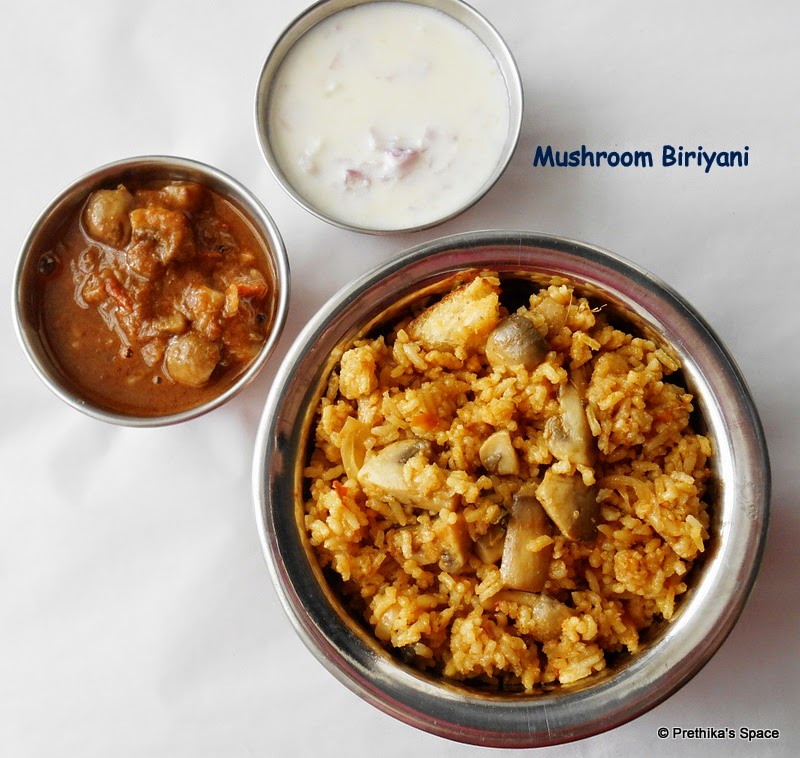
Mushroom Biriyani


What's gonna be a better way to start your weekend,without a special lunch menu.?!!! No ways isn't it ?And ofcourse no weekends will get fulfilled without a special food.Agree !!! Here's my post which would make your weekend or your special day even more special.Nowadays across India Biriyani's are a mass hit.Be it a simple birthday party or a grand marriage occasion,biriyani will definitely occupy the menu.There are lots of varieties in biriyani,from veg to non-veg and from state to state there are variations in making them.But whatever might be any biriyani is simply awesome to me.Its a comforting food for sure,just a biriyani with a raita would make fulfilling combo.I present here a tasty mushroom biriyani and its my simple method to make this biriyani.To make this biriyani even more rich i add cashew paste and saffron milk too,but my today's post will follow a simple method..


Make this yummy biriyani and make your meal special.


Ingredients


Serves - 3


Mushroom - A handful
Onion - 1 big
Tomato - 1 big
Ginger garlic paste - 2 tsp
Lime juice - 1/2 tsp
Pudhina/Mint Leaves - few
Coriander Leaves - few
Green Chillies - 3 no's
Yogurt - 2Tbsp
Turmeric powder - 1/4 tsp
Red Chilly Powder - 1.5 tsp
Garam Masala - 1/2 tsp
Bread slices - 4 no's (optional)
Zeera Samba Rice - 1.5 Cup
Water - as needed
Salt - as needed
Oil - as needed
Ghee - 2 tsp

Spices 


Bay Leaf - 2 no's (small)
Cinnamon - 3 sticks (1")
Cardamom - 2 no's
Cloves - 2 no's
Star anise - 1 petal 

Method

  • Chop the tomatoes,slice the onions,slit 2 green chillies (from the 3no's),Clean the pudhina and coriander leaves.clean and slice the mushrooms.Keep the ginger garlic paste ready.In a mixer add few pudhina and coriander leaves and 1 green chilly(my chilly was too hot so i took 1no) and grind them without adding water,keep aside.Wash and keep the rice separately.In a pressure cooker add oil and add the spices when the oil is heat enough.Saute until the spices flavor arise.


  • Add sliced onions and saute until the onions turns golden brown.Add the ginger garlic paste and saute for awhile.Then add the pudhina-coriander paste and saute again.

  • Add the chopped tomatoes and saute until the tomatoes are well cooked.To cook the tomatoes fast add some salt.Then add mushrooms and saute again.Wait until the mushroom leaves the water from it and when the water gets evaporated add the red chilly and turmeric powder.Add salt.

  • Add the yogurt and mix well and saute until the oil leaves from it.Then add the water for 1 cup add 3cup water,If adding basmati add 2 cup for 1 cup rice.Allow the water to boil.Add the soaked rice and mix well.Check for the salt and spice now.You can add salt or spice at this time if its not sufficient.Allow to cook in open ,without placing the cooker lid.

  • Cook until the rice is 3/4th cooked and the water is almost absorbed.Spread few pudhina laeaves and garam masala and the ghee and mix well.Close the cooker with the lid.Cook for 7 to 10 minutes under low flame.After 10 minutes remove the lid and mix the biriyani with the ladle.If you wish to finish off the process you can stop at this stage.If you wish to add bread slices you can proceed the next step.

  • Take the bread slices and cut the corners and cut them in cubes and saute them in a pan with ghee.Add the fried bread to the biriyani when its hot enough.

  • Serve with onion raitha and any gravy.
Read More..

Paal Bun / Jeera Bun


This is a very peculiar and not usually found in many sweet shops.Only few shops would make this ,and too, it would get sold in minutes.Its rarely found in city shops,in truth i haven't ever seen this major cities,but in village surrounded places you could find this bun very frequently.Just like donuts they are fried in oil and dipped in sugar syrup.This bun is so airy inside ,with a crystallized sugar coating outside.Just a one bite will never let you stop asking for one more.I have tasted this bun at my native place and to say, am a die hard fan for this paal bun.I have tried many times to recreate this recipe at my home but each time either the dough mixing will go wrong or my sugar syrup will go bad,after many attempts am finally up with this recipe and am so happy to make this recipe a success at last.


Also called as jeera bun in some places,where jeera is the sugar syrup.This bun is so soft and airy you could find this in the below pic.


Ingredients


Maida - 1 1/4 Cup
Fresh Curd - 1/8 Cup
Water - 1/8 Cup
Sugar - 1/8 Cup
Baking soda - 1/4 tsp
Salt - a pinch
Refined oil - 3 Tbsp + for frying

For Sugar Syrup 


Sugar - 2Cups
Water - 3/4 Cup

Method


  • In a mixer add sugar and curd,mix it until the sugar gets dissolved and keep aside.In a vessel add curd-sugar,baking soda and,salt,water and mix well.Leave the mixture for atleast 15 minutes,you can find a frothy layer on top.Add the half of the oil and mix well and add the maida little by little and form a dough.


  • If you find the dough to be too sticky add little amount of maida.The final dough should be loose and sticky.Finally add the remaining oil and cover the dough with a lid and leave aside for atleast 7 hours.Alternatively you could leave the dough overnight also.


  • The next day you can start with making sugar syrup.Take the required sugar and water in a pan and boil for 5 to minutes or until you get a string consistency.You can check this by touching the sugar syrup between your index finger and thumb finger ,you can find a string/thread like structure,by that time you can switch off the flame and allow your sugar syrup to cool.Alternatively ,you can also check this without harming your fingers by taking a bowl filled with water.Then with the help of a spoon drip the syrup into the bowl if you find the syrup settling at the bottom of the bowl then its ready.You could see my syrup which has started forming crystals when it is getting cooled down.


  • Take the dough,knead the dough by adding a tsp of oil and divide the dough into equal sized balls and with the help of the chapathi rolling pin,for small disc out of the balls with 1/8" thickness.Or just the thickness of a puri could do.


  • In a pan add oil and heat it.Fry the small puri's in oil by turning it sides.And dip the fried buns in sugar syrup for 5 to 10 seconds only.Repeat to all the buns and keep them aside.You might see the sugar crystals on top the buns.


  • Its ready to serve now.


Note

  • Depending upon the flour it may require more or less quantity of maida while forming the dough,so try to keep atleast 1/2 cup of flour reserve.
  • Once done try to consume it on the same day.
Read More..

Manathakkali Vathal Kuzhambu


There are lots of healthy benefits from manathakkali ,also said to be as European black nightshade or simply as black nightshade plant.The leaves are this plant are used for treating mouth ulcers and stomach pains,which is cookied like greens along with dal.This plant also yields small berries or fruits,they can either be used fresh or dried and used in gravies.Even more medicinal benefits are with manathakali plant.


The dried berries of this plant can be used in gravies or simply fried in oil and made as a sidedish for rasam or curd rice.The dried berries are said as vathal in tamil language.I have made a gravy,vathal kuzhambu, using these dried berries,there are many varieties of vathal kuzhambu,its a one of these.This healthy and simple gravy recipe comes below as...


Ingredients


serves 2-3

Manathakkali Vathal (dried) - 2 tsp
Small Onion - a handful
Tomatao - 1 small
Tamarind juice/pulp - (small lemon size)
Garlc pods - few (optional)
For the Vathal Kuzhambu Powder
Fenugreek Seeds - 1 tsp
Coriander Seeds - 3.5 tsp
Dried Red Chilli - 2 nos
Pepper - 1/2 tsp
Curry Leaves - few

For Tempering


Fenugreek Seeds - few
Mustard Seeds - few
Curry Leaves - few
Gingely Oil - as needed
Salt - as needed

Method


  • In a heavy bottomed kadai dry roast the ingredients mentioned under vathal kuzhambu powder.Transfer to a bowl allow to cool .In the same kadai add some oil and roast small onions and allow to cool.Also add some oil and fry the dried manathakkali berries.Meanwhile extract the tamarind juice and keep aside.In a mixer grind the masala for vathal kuzhambu ,keep it separate and also grind the small onions to a paste and keep it aside.In a kadai add some oil and temper with mustard and fenugreek seeds,then add the garlic pods.


  • Add the onion paste and add some oil and saute them.Then add tomato ,salt and curry leaves again saute them until the tomato looks well cooked.


  • Then add the vathal kuzhambu powder ,saute for a while and add the tamarind pulp and some boiling hot water.Add the fried manathakkali berries.The gravy should be watery after adding water.When the gravy starts boiling add some gingely oil and allow the gravy to reduce to 1/4th its volume and when you find the oil separating from the gravy the garvy is done.


  • Serve with hot rice along with pappad.


Read More..

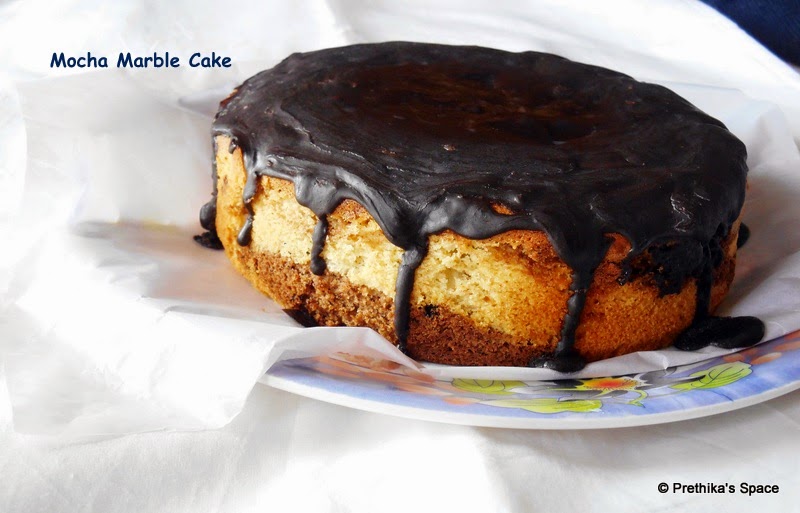
Mocha Marble Cake


This cake is absolutely a chocolicious treat  to my readers.Over a week i got bored in my kitchen i wanted to try out something new and since its been long time i baked any stuff ,i decided to bake.And what to bake ? this question revolved my head like anything...Then what to do ? I took my recipe collections to find out something interesting and ,finally sort out 3 cake recipes .I felt problematic in choosing the right recipe.If given a chance i would go out and work in my kitchen till late night to finish off the 3 bakes ...Really...Am enthusiastic towards baking!! .As am not good enough in selecting one from three ,so i left this duty of choosing a recipe to my dear H,and he selected this recipe. Initially i was not much impressed to start making this cake,since am not much impressed towards any chocolate cake I've ever tasted I am die hard person towards Chocolates,but not a chocolate cake fan ever before that.But all my opinions turned down after tasting the final slice. Omg ...really it was so impressing and i could taste the heavenly chocolaty flavor with this final glazing too.


I became a fan for Mocha flavor from now on!!.I guess the addition of chocolate bars enhanced the taste ,rather than a cocoa powder if added.To get the original flavor of this cake ,i suggest you to go with chocolate bars.And i think this cake could go places even for special occasions.Until tasting this cake i had a mindset of marble cakes coming under the category of  tea cake,but my conclusion was misunderstood and I've changed it ,that this marble cake could be used both as tea cake and celebration process.Agree !!! Readers please excuse me of not clicking the cake slice as I didn't get my perfect marbled effect..Since it was my first attempt in trying marble cake.I will update my perfect marbled effect the next time when i make this recipe.


Lets look into the baking method.


Ingredients


All Purpose Flour - 1 Cup (150 gms) (My 1 Cup measured to 150 gms)
Butter (softened at room temperature) - 1/2 Cup
Castor Sugar - 1/2 Cup (heap measurement)
Milk powder - 1/2 Cup
Eggs - 2 no
Instant Coffee Powder - 1/2 Tbsp
Chocolate - 28 gm (semi-sweet or dark compound,broken into small pieces)
Baking Powder - 3/4 tsp
Lukewarm Water /Milk - 3 Tbsp
Vanilla extract - 1/2 tsp


For Chocolate Glaze


Chocolate - 60 gm (semi-sweet or dark compound,broken into small pieces)
Butter - 1 Tbsp
Water - 1 Tbsp


Method:


  • Preheat Oven to 200°C / 390 ° F .Grease the pan with butter and dust with a little amount of all purpose flour ,or place you parchment/butter paper in the pan.Sieve the flour with baking powder and keep aside.
  • In a Heatproof bowl take the broken chocolate bars along with the coffee powder,If you are using a microwave for melting the chocolate keep it 30 seconds first,at the end take them out and finely mix them break any unsolved chocolates and again keep it under 10 or 20 secondn.You should get the mocha in a running consistency.
  • Alternatively you could follow this simple method if your oven is in preheat mode.Take a pan fill with water allow to boil ,when it starts boiling place your mocha mix kept in a heatproof bowl and mild keep on mixing until all the chocolate has solved and it reaches a flowing consistency.keep aside in a warm place.Note depending on the temperature in your place the melted mocha chocolate may again get hard.so better keep it under hot water .(My melted mocha started to get hard near the edges when i was about to mix half of the batter ,so keep in note to keep the mocha mix under hot water.)
  • In a bowl add the softened butter and sugar and blend them for a while ,don't over do them ,else the butter would curdle.


  • Add the milk powder and beat for few seconds.Then add the eggs and beat them until they are incorporated,say 1minute.Remove the blender.Take a wooden spoon / ladle,Add the flour, mildly fold the flour and ensure the batter is well mixed without any lumps.If you find the Batter to be thick add upto 3 Tbsp of warm water or milk.If not omit adding water./milk.


  • Divide the batter into portions and add half of the batter to the mocha mix and bind them well.In the other half batter add vanilla essence and mix well.Take your pan ,place spoonfuls of the two batters alternatively.


  • With the help of a skewer drag through to create a marble effect.Bake in the preheated oven under 200°C for 10 minutes and at 180°C for 20 minutes.Check for the cake by inserting a wooden skewer at the center,if it comes out clean then remove the cake from the oven allow to cool ,invert the cake tin and remove the cake .Place the cake under a wire rack to cool.


  • For chocolate glazing ,place the broken chocolate bars,butter and water and keep under microwave for 30 - 40 seconds.The glaze should be free flowing.Immediately spread the glaze on the top and on the sides of the cake ,working quickly.Let it set .


  • Serve once the glaze is set.
I welcome you all to try out this recipe and leave your beloved comments in my comment box .Thank you readers.
Read More..

Potato Cheese Balls


Inspired by its name I decided to try it by myself in a simple way.I framed a picture of cheesey strands coming out of the potato balls in my mind...OMG.., my imagination tempted me more to get soon into this recipe.My process started soon,and all the things needed for making balls are ready and my cheese cubes are cut ...The one  lovely thing i liked much while making the potato chesese balls ,that's... stuffing the cheese cubes with mashed potato.I really enjoyed while covering the cheese with mashed stuff,also done it carefully.But when coming to frying stage i wanted to try it to be less caloried so i planed to shallow fry them using the paniyaram pan.This was so easy and you will get satisfied for using less amount of oil.Alternatively i tried half a portion of the balls deep frying, using the regular frying method.Compared to the taste,both tasted to be alike but personally i felt the balls fried using regular method was bit more tastier.But its left to you to choose the frying method.


 Cheese are always kids favorite at anytime and when presenting them in their most likely way ,makes them have more.This dish could be done under 30 minutes ,having all the things handy.Here i have used potato mash got from store,for reducing my work time.You can also boil potatoes,peel ,grate and mash them finely.My recipe goes like this...

Ingredients


Potato Mash - 1 Cup
Corn flour - 1/2 Tbsp
Chilli Powder - 1/2 Tbsp
Ginger Garlic Paste - 1 tsp
Grated Garlic - 1 tsp (optional)
Cheese Cubes - 6 - 8 (cut them in cubes)
Maida - 3 Tbsp
Bread Crumbs - 1/2 Cup
Salt - as needed
Water - as needed

Method


  • In a bowl add the potato mash,corn flour,chilli powder and ginger garlic paste and grated garlic and salt.If you are using fresh boiled and mashed potatoes no need to add water.If you are using store brought mash potato add upto 1/4 C water and leave it for few minutes and then manually mix all ingredients to get a dough.If you find the dough forming to be difficult add little bit of water,say 1 Tbsp at a time and mix it.Once you attain the dough make equal(small lemon size) sized balls out of the dough,Meanwhile in another bowl add maida and water to form a running consistency batter and in another bowl keep the breadcrumbs.


  • Now take each balls and with help of your palm and fingers form a small cup and place the cubed cheese and gently cover the cheese with potato dough.Once you get a ball shape ,press firmly using your palm and keep it a plate.Do it for all the remaining balls.


  • Then take each ball and dip it in the maida batter and coat with breadcrumbs.


  • Repeat for all the cheese balls.(You could store this cheeseballs after this stage in your refridgerator for a week.)Next comes the frying part you could choose anyone option to fry either using paniyaram pan or using your kadai for deep frying.Fry them ...


  • Serve with tomato sauce/ketchup.
Read More..